Interactive Login
Username lookup
Before you can log into an interactive session on HoreKa, you have to look up your login username. You can do so on FeLS by clicking on the Registry info link in the HoreKa service box:
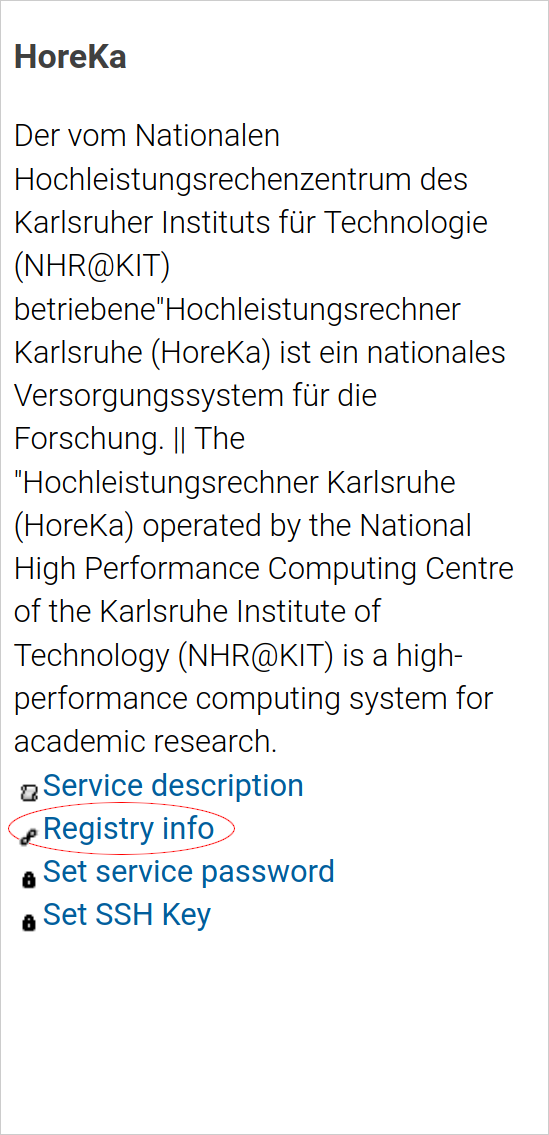
The username can be found on the line Username for login:. In this example image, the username would be hgf_izc0875:

Recommended Tools
-
OpenSSH: Supports interactive logins and remote file transfers on a wide variety of operating systems, including Linux, Windows and macOS.
-
MobaXterm: supports interactive logins, remote file transfers and X11 forwarding on Windows.
-
FileZilla: supports remote file transfer on Windows/Linux/macOS.
SSH login process
After finishing the registration process, HoreKa is ready for your SSH based login.
Network access limitations
Please note that you have to be connected to an allowed network to access HoreKa. See the network access limitations section for more details.
A connection to HoreKa can be established using the following ssh command line (replace username with your actual username):
$ ssh username@horeka.scc.kit.edu
Host authenticity
When you log in, you may receive the message The authenticity of host '<host address>' can't be established. along with the host key fingerprint. This is intended so you can verify the authenticity of the host you are connecting to. Before you continue you should verify, if this fingerprint matches one of the following:
- RSA:
SHA256:p6Ion2YKZr5cnzf6L6DS1xGnIwnC1BhLbOEmDdp7FA0 - ECDSA:
SHA256:k8l1JnfLf1y1Qi55IQmo11+/NZx06Rbze7akT5R7tE8 - ED25519:
SHA256:yEe5nJ5hZZ1YbgieWr+phqRZKYbrV7zRe8OR3X03cn0
If you are using OpenSSH (usually installed on Linux based systems) and want to use a GUI-based application on HoreKa, an X11 forwarding can be established by adding the -X parameter to the ssh command:
$ ssh -X username@horeka.scc.kit.edu
The login nodes of HoreKa are the access points to the compute system and to your $HOME directory. HoreKa has three dedicated login nodes and 2 login nodes with AMD processors as part of the HoreKa extension. All incoming connections are automatically distributed across all available login nodes to increase performance and stability. This means that when you open multiple concurrent sessions, they will run on different computer systems.
If you want to target a specific login node, you can use the following host names:
-
hk-login1.scc.kit.edu
-
hk-login3.scc.kit.edu
-
hk-login4.scc.kit.edu
-
hk-login-amd1.scc.kit.edu
-
hk-login-amd2.scc.kit.edu
Example login process
After the connection has been initiated, a successful login process will go through the following three steps:
-
The system asks for a One-Time Password. Generate one using the Software or Hardware Token registered on FeLS (see 2-Factor Authentication) and enter it after the
Your OTP:prompt. -
The systems asks for your service password. Enter it after the
Password:prompt. -
You are greeted by the HoreKa banner followed by a shell prompt.
The result should look like this:
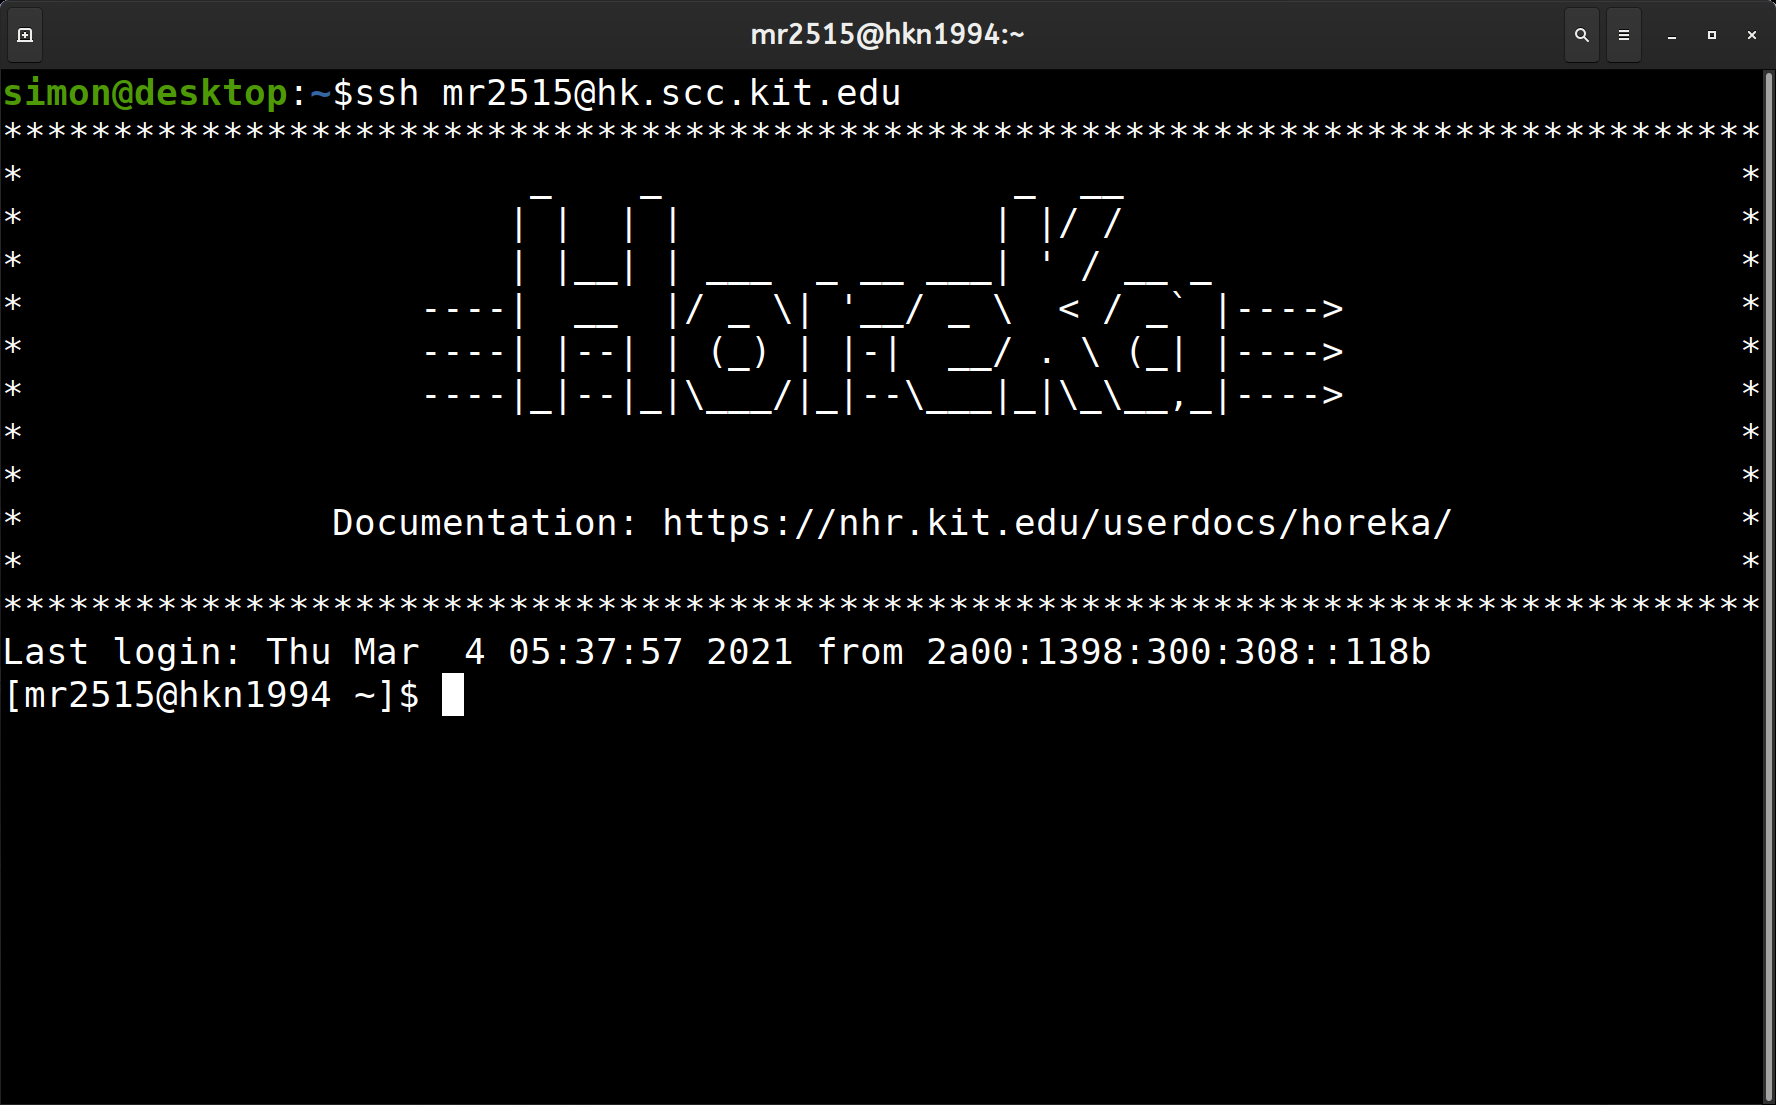
If the Your OTP: prompt doesn't appear, but you immediately get the Password: prompt instead, this means that the system could not find your username. Please make sure that you are using the login username you have looked up as described in the first chapter. If you are sure the username is correct, please contact the support channels.
If the HoreKa banner appears, but you are presented with an error message and the connection is terminated immediately, please contact the support channels.
Network access limitations
Access to HoreKa is limited to IP addresses from a number of well-known German institutions and networks listed below.
You should be able to connect to HoreKa without restrictions if your device is located on one of these networks, e.g. if you are at your office on the campus of one of these institutions or connected to the campus WiFi. If you are outside the mentioned networks (e.g. in your home office), a VPN connection to your home institution has to be established first.
In general it is a good idea to just try if you can access HoreKa from your office or using your home institution's VPN connection. If it doesn't work immediately, try to force your client to use IPv4 (e.g. ssh -4) or IPv6 (e.g. ssh -6) manually.
If both protocols don't work, or if you are located outside of Germany and haven't been provided with a VPN connection to a German institution, please navigate to https://wieistmeineip.scc.kit.edu/ and provide the support channels with the IP addresses shown on the page. We will then find the best way to get you on HoreKa.
List of currently allowed networks
- KIT internal networks
- All universities and universities of Applied Sciences in Baden-Wurttemberg
- All Helmholtz member institutions
- All NHR centres
- Many academic and scientific institutions in Germany (Note: some only via IPv6)
Allowed activities on login nodes
The login nodes are shared between all other users. Therefore activities allowed on the login nodes are limited to setting up and managing your batch jobs. Allowed activities comprise the following examples:
-
Viewing and editing files
-
Executing batch system commands like
sbatch,salloc,squeueetc. -
Compilation of your small- to medium size code bases
-
Short pre- and postprocessing runs on a small number of cores
Everything that blocks a small number of cores for more than a couple of minutes must be executed on other nodes using the batch system. This also affects long-running compilation procresses or long-running pre- or postprocessing runs.
Any compute job found to be running on the login nodes will be terminated without further notice.
SSH Keys
In contrast to many other Linux-based systems, it is not possible to self-manage your SSH Keys by adding them to the ~/.ssh/authorized_keys file. Existing files with this name are not evaluated on HoreKa.
SSH Keys have to be managed via FeLS instead. Please refer to the Using SSH Keys chapter for more information.
Home directories
If you are in more than one project group, your home directory (the directory you see after login) will be located in a path that is derived from the project you have been a member of the longest.
Multiple project memberships
With the command
$ id
you can see all project groups you are in. You can temporarily switch to a different group in your running interactive session using the following command:
$ newgrp <new_project_group>
Changing the project group does not mean to change the accounting behaviour of your batch jobs. If you want to debit a specific account and a specific project group respectively you have to use the sbatch option -A (--account=...) when starting batch jobs.